Users and roles
Add and deactivate users, and control what each person can see and do with roles.
This page needs administrator access. Only users whose role includes Administrator see the Admin menu.
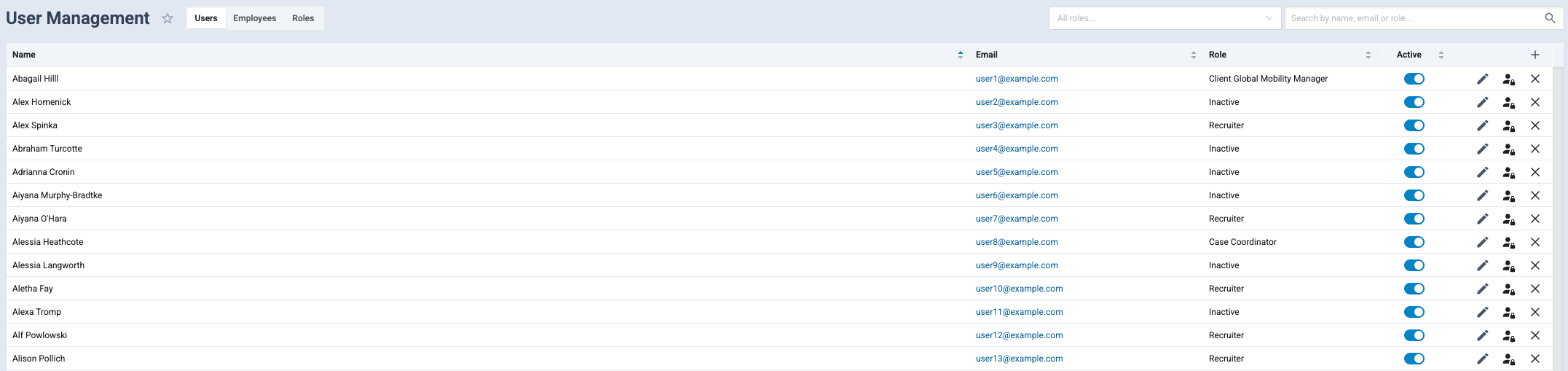
Open User Management from the Admin menu. It has three tabs: Users, Employees and Roles. Use the search box (Search by name, email or role...) and the All roles... filter to find people.
Add a user
- On the Users tab, click the + icon in the table header. The Create User page opens.
- Under General, enter First Name, Last Name and Email, and choose a Role. Phone numbers and address are optional.
- If the person is an attorney, give them a role with Attorney and fill in Attorney Details (bar number, law firm and so on). These details are used on forms such as the LCA.
- Click Save and Close, or Save and Continue Editing to stay on the page.
When you save a new user, Agnos emails them a link to set up their access. If they lose it, click the Send registration access message icon on their row to send a new link.
Email sign-in link lets a user finish signing in with a one-time email link when they can't receive the text or call code. Their password is still required.
Deactivate or remove a user
- To stop someone from signing in, turn off the Active switch on their row. The change applies straight away, and you can turn it back on later.
- To remove a user, click the delete icon on their row and confirm. They are removed from all the records that use them, so deactivating is usually the safer choice.
Administrators can't see or reset another user's password or sign-in codes. Users reset their own password from the sign-in page. See Signing in.
Roles
A role is a set of permissions you give to many users at once. Open the Roles tab to see each Role Name and its main permissions. From a row you can Duplicate Role (give it a new Role name), edit it, or delete it.
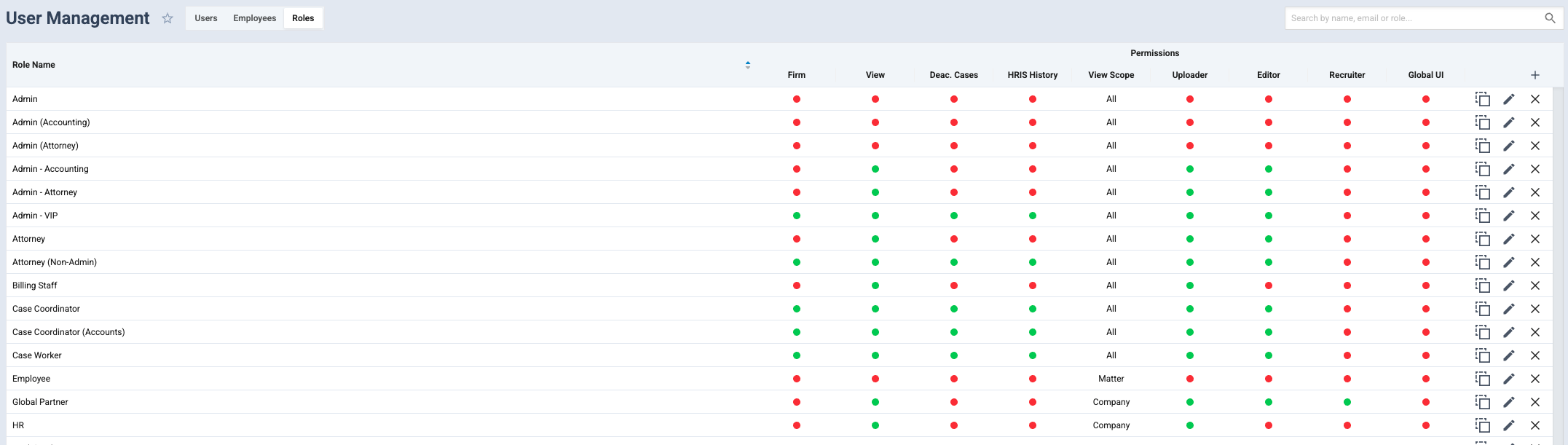
To create a role, click the + icon. On the role page:
- Enter the Role Name.
- Tick the permissions the role should have. These include Administrator, Attorney, Editor, Firm, View, Uploader, Recruiter, Hiring Manager, Global UI, intraLCA, E-Filing Assistant, Document AI Review and others. Billing, Accounting and Timetracking appear only when those modules are on.
- Set the View Scope: All, Company, Matter or None.
- Choose the Companies the role can work with (see below), and optionally Dashboards and Folder Access.
- Use the detailed tabs to fine-tune access: View Types, Fields, Case Milestones, Recruiter Portal and, with billing on, Hourly Billing Rates.

Which companies a role can see
The Companies box limits the role to the companies you list.
- With Administrator ticked, or View Scope set to All, the role covers all companies and the box shows All Companies.
- With other scopes, list the companies the role should see. Otherwise the box shows None.
An empty Companies box does not always mean every company. Check the View Scope before you save.
Field and view permissions
The Fields tab controls which fields the role can see or change, and View Types which kinds of records it can open. These tabs are turned off when View Scope is All. Field permissions are also covered in View Designer.
Give one user different settings
On a user's page, the Role Settings panel shows their role's permissions. Any change you make there overrides the role's defaults for that user only, and later changes to the role no longer apply to the settings you changed. Click Restore Defaults to go back to the role.
Changing a user's Role resets any custom settings you gave them.
IntraLCA access
To use IntraLCA, a role needs intraLCA (or Administrator). What the person can do then follows their other permissions: Administrator, Attorney and Editor can prepare and file LCAs, Uploader can add documents and View can look. See IntraLCA overview.
Related
Last updated Nov 17, 2026
Still need help?
- Ask your firm's Agnos administrator. They manage users, permissions, forms and settings for your firm and can fix most access problems right away.
- Use Help in Agnos. Open your profile menu and choose Help to email your firm's support contact.
- Contact Agnos support at support@agnos.global. Say which page you were on and what you expected to happen. Never send passwords, and send client documents only through Agnos itself.